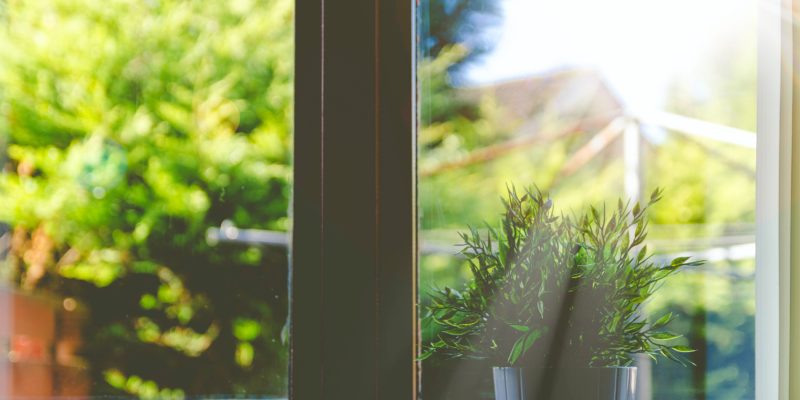
A kitchen window looking out across a green garden with sunlight coming through.

Can You Replace Double Glazing Glass?

If your double glazing has failed, your home won’t be as energy efficient as it should be. Before you replace your windows, frames and all, consider whether you could just replace the glass. It can be a very effective and budget-friendly solution. 

Can I replace just the glass in a window?
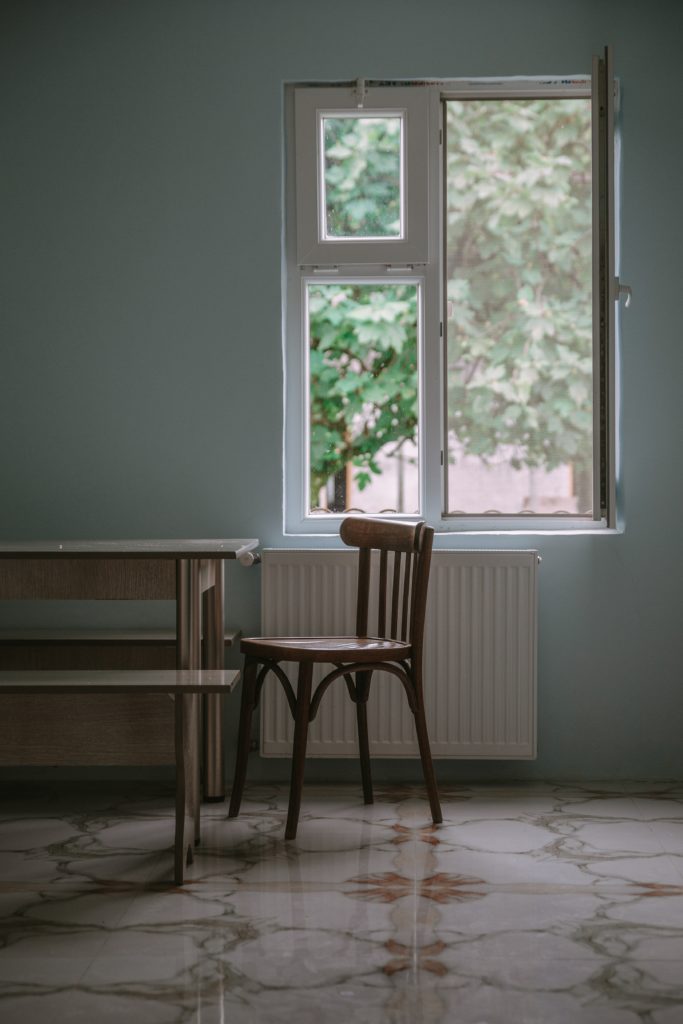
double glazed windowIn short, yes! If your windows aren’t as energy efficient as they used to be, you can replace the double glazed glass unit without having to replace the whole window. 

Benefits of just replacing the glass include cost-saving, as this is usually cheaper than replacing the entire window including the frame. It’s also simpler and faster to replace the glass unit only. You can keep the style of your window the same too, whilst reaping the rewards of a more energy-efficient window. 

How long should double glazed sealed units last?

Double glazed units are expected to last around 20-35 years. Sometimes they can last even longer than this! So you’ll get a good lifespan from them. However, the units will eventually ‘blow’. This means that the seal in between the two panes of glass is no longer effective, and won’t be controlling the temperature in your home as it should.  

How to tell if double glazing needs replacing
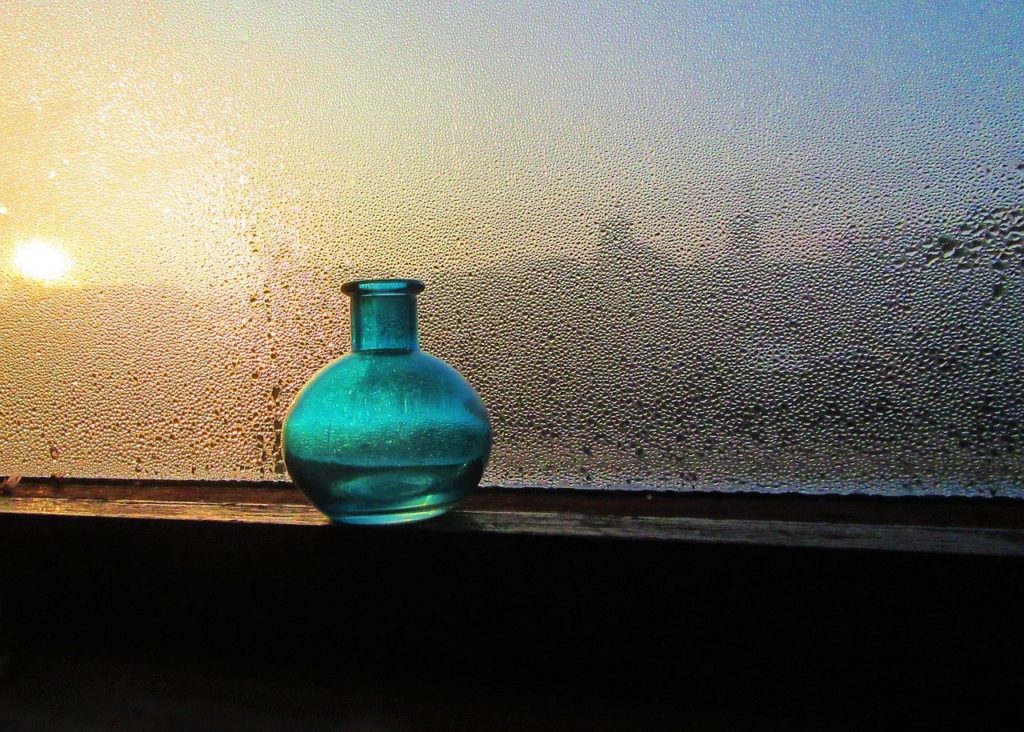
condensation on windowHere are some telltale signs that your double glazing has failed. 

  • Condensation between panes of glass: this is one of the biggest signs that the window has blown. Condensation can’t form in between the panes when the double glazed unit is properly sealed.
  • Cloudy glass: as above, the glass may appear slightly cloudy due to condensation inside the glass.
  • Chips or cracks in the glass: any damage to the glass may have an impact on the overall effectiveness of the double glazed unit. 
  • Draughts: a draughty window is never a good sign! Although drafts are likely to be a problem with the frame, they may also indicate the double glazing seal has blown. 

If you notice any of the above signs, it’s likely that you need your double glazing or windows replaced. 

How much does it cost to replace double glazing glass?

The average cost to replace a blown window is £55-£145. The price will depend on the size of the window. Larger windows require more glass and also take longer to replace, so material and labour costs increase as the size of the window increases. 

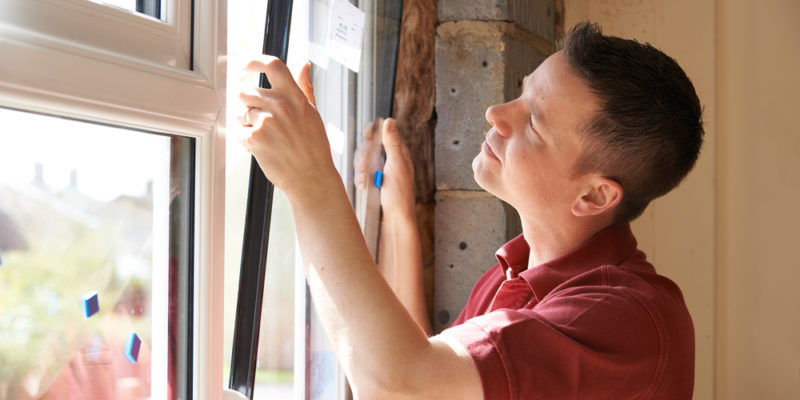
How to replace double glazing units: step by step

There are different types of double glazing system available, these instructions are intended to provide a rough guide for the most common type. 

  1. Starting from the inside of your window, remove the wedge gasket.
  2. Move to the outside and remove the glazing beads. Leave the top one until last.
  3. Make a note of where any glazing packs are located before removing and from around the top and sides.
  4. Remove the blown double glazed unit.
  5. Check the glazing packs are still in the bottom and place the new glazing unit on top.
  6. Hold it secure, and add any other glazing packs back into their original location.
  7. Keep a hold of the glass unit whilst replacing the glazing beads in the reverse order.
  8. Replace the wedge gasket, which will lock everything in place. 

It’s important to familiarise yourself with the double glazing system, as there are different possibilities. The above instructions are intended as a rough guide only and will not be accurate for every type of double glazing. 

Replacing Double Glazing: What you Need to Know

  • You’ll need to measure up and order your double glazed unit before you start. Height and width are fairly easy to determine but thickness can be more challenging. You can always give us a call with approximate measurements and we’ll take it from there. 
  • Different types of glass are available, so you’ll need to decide which type you need for your replacement panel. 
  • Whilst this is a job you could tackle yourself, we can help with any step of the process. Just give our sales team a call on 0115 9222233 or get in touch via our contact page.
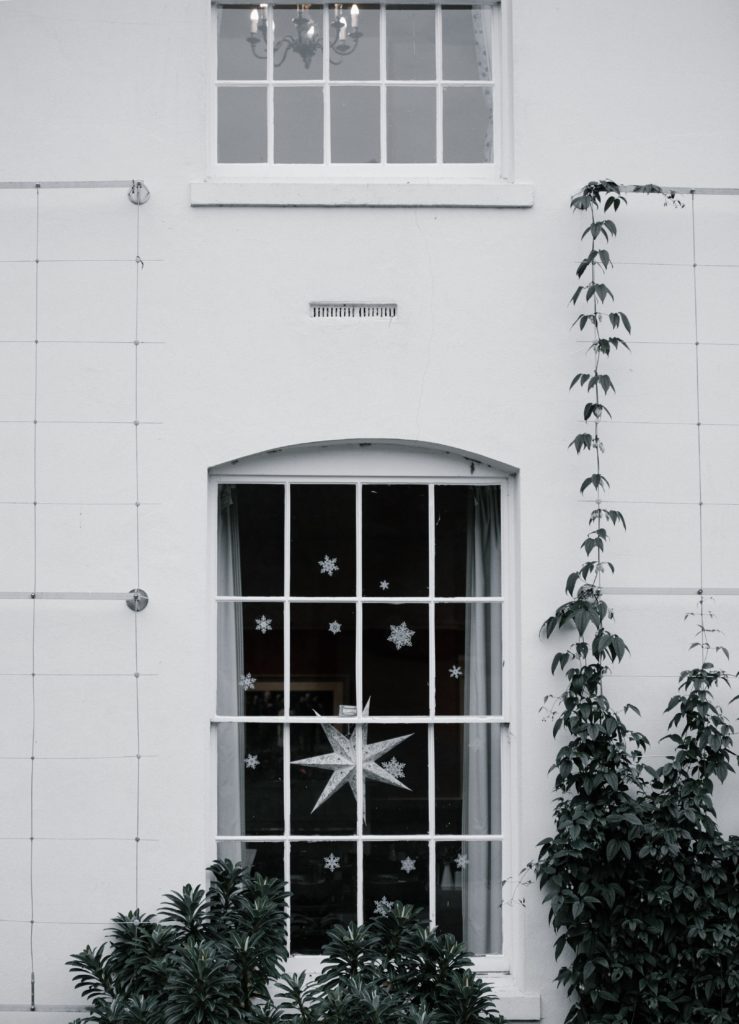
christmas window

How to Decorate Windows for Christmas (without damaging the glass)

As the festive season begins, it’s wonderful to bring some cheer to your household with lights and decorations. A prime decorating spot is the window, as there are so many ways to dress it up. Christmas window displays can make a big impact inside and outside your home.  

Decorating your window to create a festive atmosphere is a big part of Christmas preparations for many. There are a few things to avoid though if you want to keep your glass in good condition. Here’s how to decorate your windows for Christmas without dealing with damage in the new year. 

Christmas Window Decorations

The majority of Christmas window decorations are easy to put up and remove without causing any damage to your double glazed windows. Here are some of our favourites. 

Window ‘Cling’ Stickers

snowflakes in windowWindow stickers might sound like something to avoid if you want to keep your glass in good condition. But a good window ‘cling’ sticker doesn’t use adhesive. It uses static electricity to cling to your glass and can be applied and removed easily, with very little clean up required. You can use this type of window sticker to quickly create a christmas display, and re-use the window clings for years to come.

Curtain Lights

Curtain lights are specially designed to dress the inside of your window with a twinkly display. They typically have lots of strands that dangle down to create a full festive window dressing in one go. Hang them with a tension rod or no damage adhesive clips and make sure they hang slightly away from the glass itself to avoid any small scratches or marks.    

Baubles

Just like curtain lights, baubles are a cost-effective way to fill your whole window with a seasonal display. You can hang them at different lengths across an existing curtain pole for a fuss-free window filler. As before, just make sure they aren’t touching the window glass as they could leave tiny scratches behind, which won’t look attractive in January! 

Windowsill Displays

There are a whole host of Christmas decorations ready to stand on your windowsill to give your home a festive feel. Effective windowsill displays tend to feature a collection of decorations on a theme, with different heights included. Light up decorations look great after dark too and may be visible from the outside. Make sure you remove any standing ornaments regularly to dust and dry the area. They may harbour condensation which can lead to patches of mould if left unchecked throughout the festive period. 

Christmas Tree

christmas treeThe classic window decoration for christmas is your tree! Simply decorate both sides and place in front of the window so it can be seen from the outside. Christmas trees make stunning window decorations, as nothing quite beats the glimpse of a beautifully decorated tree with the twinkling lights reflected in the glass. 

Outdoor Window Decor for Christmas

If you’re really looking to impress visitors and passers by this Christmas, you might be thinking about outside window decoration for Christmas too. Here are some ideas to dress your windows to impress!

Window Boxes

festive window boxWhy not dress your window box with festive decorations? Mini evergreen trees, pine cones or cut christmas foliage make a beautiful display. 
Garlands

Use winter foliage to create a garland around your window. Cut foliage will last longer outdoors but bear in mind that it will start to deteriorate. Create your garland a few days before Christmas for the best results. 

Lights

Outdoor lights hung around a window or underneath the frame can look particularly effective. They can provide a frame for your indoor decorations as they’re being viewed from the outside. This option might need the addition of some small cup hooks which would leave a mark in your external wall. Alternatively, sucker hooks could be added to the glass. Just make sure it’s clean before you add them and give the glass a good wipe down after removal too.

It’s Time to get Decorating…

Decorating your windows for Christmas can be lots of fun and enjoying them will bring a daily dose of festive joy. If you take your time choosing, putting them up, and taking them down with care, they shouldn’t cause any damage to your window glass. How will you decorate your window for Christmas this year?


How to Clean a Glass Shower Screen - KLG Glass

How to Clean a Glass Shower Screen

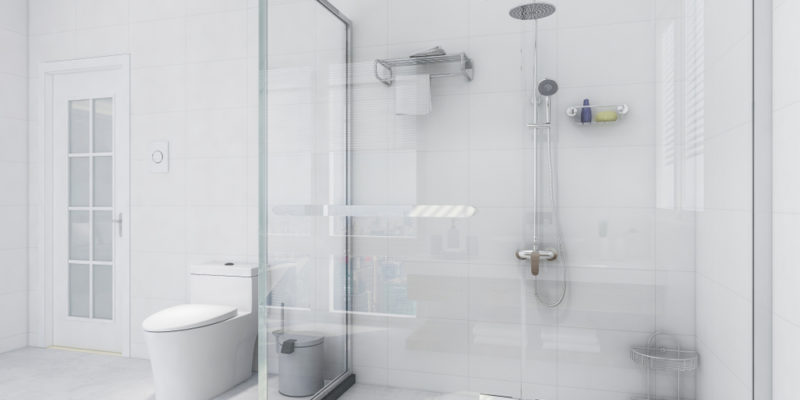
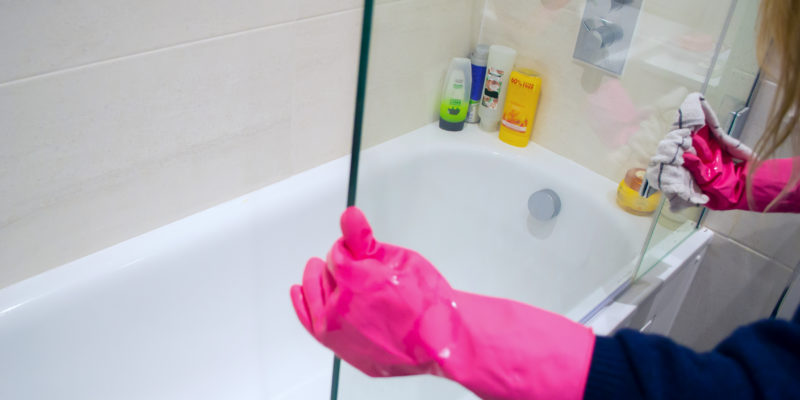
Glass shower screens protect your bathroom and look stunning. Every time you take a shower, a glass shower screen creates a barrier against water, soap, shampoo, conditioner and even steam – helping to keep your bathroom walls and floors free from stains and unsightly marks. 

Unfortunately, this does mean that a sparkling shower door can easily be spoiled by dirt and grime that builds up over time.

Worse still, hard water stains and soap scum can actually scratch the glass if left unchecked. When this happens, your glass shower door won’t look clean and sparkling no matter how much you clean it. Cleaning your glass shower screen regularly is the best way to stop this from happening, and helps to keep your bathroom looking its absolute best. 

So, how do you keep a glass shower screen clean? 

Here’s how to clean your shower door for best results:

What You Will Need:

  • A sponge
  • Bathroom cleaner, or mix one part white vinegar to three parts water in  a spray bottle
  • Glass Cleaner
  • Squeegee
  • Paper towels
  • Microfibre cloth

How to Clean a Shower Screen: Step-By-Step

  1. Get the glass wet using the shower head or a damp cloth.

  2. Spray well with your chosen cleaner, and leave for a few moments.

  3. Use a sponge to work in the cleaner, removing soap scum and hard water stains as you go.

  4. Rinse with warm water.

  5. Use a squeegee to remove the water and cleaning suds.

  6. Dry with a microfibre cloth or paper towel.

  7. For extra sparkle, spray again with glass cleaner.

  8. Let the cleaner soak for a minute or two.

  9. Wipe with a clean microfibre cloth or paper towel (scrunched up newspaper can also work well).

  10. Tackle any remaining smears by spraying with a light mist of water onto a clean, dry microfibre cloth and wipe away. 

What to Clean a Shower Screen With

There are many different options for cleaning a shower screen. Standard bathroom cleaners and glass cleaners can do a great job. But, if you’d prefer to stay away from strong chemical-based cleaners, there are also a few home remedies that are very effective alternatives. Here are a few of the most popular cleaning solutions:

Glass cleaning with dish soap: Designed for getting glassware clean and grease-free, dishwashing soap can work well for cleaning glass shower screens. Rinse any suds off thoroughly to avoid streaks when using this method. 

Glass cleaning with vinegar: Acid is an effective cleaner which helps to loosen mineral deposits. Mix one part white vinegar to three parts water in a spray bottle and you have a powerful glass cleaner ready to go. 

Glass cleaning with baking soda: Adding some baking soda to white vinegar creates a reaction that bubbles, helping to clean off stubborn stains. The baking soda is also slightly abrasive which will add to the cleaning power. 

Glass cleaning with lemon juice: Just like vinegar, the acid in lemons helps to loosen mineral deposits and dissolve soap scum. Add to your vinegar mix or use with baking soda for effective glass cleaning that’s safe and natural. It smells nice too!

How to Keep Your Shower Glass Spotless

To avoid damaging and scratching the glass, a shower screen should be cleaned after every use. The best way to do this is to thoroughly remove any surface water with a squeegee. This will stop hard water deposits of magnesium and calcium building up and damaging the glass. In an ideal world this should be done after every shower alongside your regular cleaning. In reality though, most of us don’t have time to do this as often as it’s needed.

You can add a layer of protection to your shower screen with something that displaces water. This will help the water roll off rather than sit on the glass, which once again reduces the deposits that will build up. There are a few options for this. Cleaning with WD40, baby oil, cooking spray or a specialist car windscreen cleaner will all create this protective layer. 

However, applying such products does take time and care, as you’ll have to work hard to avoid smears and grease. If you can master it though, you’ll find stains don’t build up so quickly between cleans!

So, What’s the Best Way to Clean Shower Doors? 

There are a variety of methods for cleaning glass shower doors, but the most important thing to remember is to stay on top of cleaning. Each clean will be quicker to manage, and less build up will reduce the chances of scratching and staining. Keep it clean and your glass shower door will sparkle for years to come!


Has your glass shower screen reached the point of no return and any rescue attempt seems futile? If so, why not consider a shiny new made to measure shower door that’s bespoke to your bathroom? If you’re keen to find out more, get in touch!

How Long Does Double Glazing Last?

Trying to answer this question can be tough. So many environmental factors can affect the longevity of double glazed windows, so it really does depend. The lifespan of double glazing can be anything from 10 to 50 years depending on how well they’re made, installed and looked after. However, on average you’d expect double glazed units to last a minimum of 20 years. 

The good news is that over the last few decades, technology for manufacturing double glazing units has improved exponentially and the materials that are being used has improved greatly. Double glazed windows that are made today are far more thermally and energy efficient than those that were made in the 80’s, 90’s and early 00’s. 

As a result, it’s fair to say that a double glazed sealed unit produced today will have a lifespan of 25 to 30 years – and maybe even more if fitted in a sheltered location and not subject to extreme weather. 

What factors affect the lifespan of double glazing?

The three main factors that affect double glazing are location, quality of manufacture and quality of installation. These factors can halve or double the longevity of a double glazed unit, but one of the biggest culprits for causing problems is temperature. 

The insulating gas between panes of glass in a double glazed unit reacts to changes in temperature by expanding and contracting. This is called thermal pumping and often windows that are south facing and in direct sunlight for a number of hours, are most susceptible. 

Thermal pumping can put extra stress on the seals of a double glazed unit as it constantly expands and contracts. Over time, the seals will start to fail and as minute fractures begin to grow, air will be sucked into the unit, replacing the insulating gas and compromising their thermal efficiency.

How do you know if your double glazing needs replacing? 

Energy-efficient windows are a key structural part of a property that significantly contribute to reducing energy bills and ultimately, keeping your home warm. To ensure you’re not paying more than you should be for your heating bills, it’s really important that your windows continue to perform as intended.

If you’ve noticed that your heating bills seem to be creeping up, it could be that your windows are starting to fail. But there are a number of other ways to identify problems with double glazing units too – each of which are a dead give away that something isn’t quite right:

You can feel a draught around the frame

If you run your hands around the frame where it meets the sealed unit and it feels draughty and cold, either the seals around the frame have perished or the double glazed unit itself has failed. If the unit fails, the gas that insulates the panes of glass will dissipate which will dramatically decrease the U Value. If the seal around the frame has perished, this can easily be replaced, however if the unit has failed a new one will be required.

Condensation in between the panes of a double glazed unit

Condensation on windows isn’t usually cause for concern and there are many simple ways to tackle that, but condensation inside windows should be taken more seriously.

Each sealed unit usually contains a desiccant such as silica gel, which forms part of the spacer bar inside the unit. This is there to absorb the natural moisture that occurs between the panes to keep the unit fog-free. If however the seals of the unit begin to fail, more moisture will be drawn in through thermal pumping which will saturate the desiccant. It’s this over-saturation that causes condensation and fog to form and is usually a pretty obvious indicator that it’s time to replace the unit.

It is however worth noting that condensation is more likely to form in windows that are in direct sunlight. So a north-facing window might have failed seals but won’t show condensation for example. 

There’s white dust inside the double glazed unit 

You may not see signs of condensation but once the desiccant inside a seal unit becomes saturated it will start to degrade. As it degrades it will essentially fall apart and the particles will begin to drift around the sealed unit, settling on the inside of the panes of glass. This is a sure sign that your double glazed unit is compromised and will need to be replaced.

You can hear a lot of noise from outside

Not only does double glazing act as insulation against temperature, but sound too. When your windows are closed, the noise from outside should be reduced and muffled, maybe even shut off completely. If however you’ve started to notice more noise than usual, the gas could have escaped from your sealed unit, reducing the insulation.

________

If you have a question about double glazed sealed units, or you’ve decided it’s time to get a replacement, get in touch with our expert team who’ll be able to advise on the best course of action. Here at KLG Glass we only make to order with an extensive range of glass and spacer bars to choose from, all ready and waiting to help you get the job done!

How to Fit a Shower Screen: A Quick Guide

It’s official, shower curtains are out and shower screens and doors are in. Long gone are the days of mildew stained curtains that barely do the job they’re designed for, shower screens and doors are an increasingly popular choice, and with good reason. 

Not only are they easier to keep clean, they’re also available in a number of different styles and finishes, depending on the look that you’d like to go for and the space you have in your bathroom. There are 3 main types of shower screen; static, hinged and concertina (folding), all of which have their own unique properties but serve the same purpose – to protect the rest of your bathroom from water escaping whilst you shower. 

Despite their design differences, the fitting of each style of shower screen or door is very similar. So, if you’re planning to update the aesthetics of your bathroom, installing a shower screen is a great way to do it – and with not too much effort either. 

If you’re pretty familiar with DIY and you’d like to keep installation costs down, then there’s a good chance you’ll be able to fit one yourself with the know how and tools. Though, if you’re not 100% confident you’ll be able to do the job well enough, we always recommend seeking the advice of a professional.

So, let’s take a look at how to install a shower screen and what you’ll need to get the job done…

What tools do you need to install a shower screen? 

Firstly, you’ll need to make sure you have the right tools for the job, here’s a list of what you’re likely to need:

  • Electric drill
  • Hammer
  • Masking tape
  • Pencil
  • Sealant gun
  • Spirit level
  • Standard screwdrivers
  • Tape measure

If you have a made to measure shower screen or door, you’ll likely need to buy the fixtures and fittings separately (it’s common for these to be supplied with “off the rack” varieties). These will include: 

  • Frame
  • Screws
  • Screw caps
  • Seal
  • Wall channels
  • Wall plugs
  • Silicone sealant

How to install a shower screen

While this guide will focus on the static shower screen, the fitting for hinged and concertina varieties isn’t too dissimilar. So, let’s get started…

  1. Firstly, make sure you have all the parts required for the fitting, the last thing you want to do is get halfway through the job to realise you’re missing an essential piece of the puzzle.
  2. Once you’ve made sure you’ve everything you need, check to see if the wall channels have the holes pre-drilled, if not, you may need to add these yourself. Measure these evenly according to the height and width of the channel. It’s also essential at this stage to check for pipes and wires where you plan to fix it to the wall to ensure you don’t accidentally drill into them.

  3. Once the holes in the wall channel have been established, line this up on the wall where you plan to install it. Using the spirit level as a guide to ensure it’s straight, use a pencil/pen to mark on the wall where you plan to drill the holes.

  4. Once you’ve marked the wall, drill the holes and add wall plugs. If you’re drilling through tiles, one easy way to hopefully prevent them from cracking is to put masking tape over where you plan to drill. Once drilled, remove the masking tape.

  5. Secure the wall channel to the wall using screws (these may be provided by some manufacturers).

  6. Next, secure the shower screen to the wall channel. This can be a heavy job, so it’s always advised to enlist the help of someone else to ensure no accidents happen. How this is done may also vary depending on the manufacturer and the type of wall channel you have (you may not even have a wall channel but a series of supporting brackets/hinges if a more minimalist look is preferred), so it’s always advisable to seek their advice or check out the instructions before you embark on fitting a shower screen. 

  7. You may have some bracing bars which fit along the bottom or top of the screen. If so, you’ll need to install these before fitting to the wall. These not only help stabilise the glass but can also help prevent water escaping, too.

  8. If you have multiple screens to install as part of your shower enclosure, you’ll likely need to repeat the same process.

  9. Once all screens have been fitted and you’re happy the job is done, run a bead of silicone sealant around the edges of the wall channels or brackets with a sealant gun. Remember to leave the silicone sealant to completely cure for at least 24 hours before taking a shower.

While we know that not all shower screens and doors are fitted the same, we hope our easy guide has given you some idea about how to get the job done. If however you’ve decided fitting a shower screen isn’t for you, we definitely recommend getting a professional in to do the job.

Decided it’s time to trade in the shower curtain for a shiny new bespoke shower door designed to your specification? Whatever it is you’d like, give us a call to see how we can help… We can even give you a hand with the fitting if you’re within a 20 mile radius of our Nottingham office!

For Sale Sign - 5 Ways to Boost the Appeal of Your House With Glass - KLG Glass

Selling Your House? Here Are 5 Tips on How to Use Glass to Boost Its Appeal

It’s been a weird year so far, and you’d definitely be forgiven for wanting to change things up with a fresh start somewhere new. If this year is your year to find your dream home, then it’s probably time to jazz up your current house and give it some kerb appeal ready for it going on the market.

Buying and selling a house is likely to be one of the biggest and most stressful decisions you’ll make in your life, so it’s important to make the process as easy and quick as possible, right? 

Giving your house the wow factor is probably one of the most important things you can aim for when selling. Wanting a prospective buyer to fall in love with your home as soon as they walk through the door is key for getting the ball rolling, and there are a number of things you can do that are both easy to do and inexpensive. 

Here, we’re going to take a look at how to use glass to improve your home, with a few other quick and easy home improvement tips thrown in for good measure.

Strategically placed mirrors

Mirrors are a fantastic way of creating the illusion of space. If you have a small room or slim hallway, a made to measure mirror placed horizontally can widen an area as well as add light. To that end, if you have an area that doesn’t really get all that much natural light, placing a mirror opposite a window can really brighten it up as it’s reflected around the room. 

One thing to avoid with mirrors when trying to sell your home, is placing them directly opposite a door way, particularly your front door. Being greeted by an unexpected vision of yourself can make some people uncomfortable, so it’s always best to steer clear if you can. Despite their purpose, making mirrors as inconspicuous as possible is the key. If you want some more handy tips on using mirrors in your home, check out our blog post on how to use mirrors to maximise space

Let the light flow with glazed internal doors

Whilst it’s not necessarily one of the cheapest things to do, replacing solid internal doors with glazed doors is a great way to create a flow of natural light around your home. This is particularly useful for houses with a more linear structure such as terraces which can fall victim to dark spots as the day moves on. 

Creating a light, bright atmosphere in your home not only makes it feel bigger, it can also be quite calming. Unless you’re looking for a project, you’ll know as a buyer how important getting that “feel” for a place really is and maximising the light is a great way to do this.

Replace wooden shelves with glass shelving

Much like solid doors, solid furniture can become a bit of a sticking point when it comes to blocking out natural light, creating giant shadows and dark spots in a room. If for example you have a large bookcase that takes up a lot of wall space, not only can this be quite imposing, it can also make a room feel smaller as it likely draws a lot of focus. Replacing solid shelves with a series of glass shelves will not only help increase light flow but will add a modern, sleek touch to the room too. 

Replace grubby tiles with a glass splashback

If your kitchen or bathroom tiles are looking a little worn out and in need of a refresh, replacing them with a glass splashback can actually be a much quicker and cheaper solution. The kitchen in particular is one room that most buyers will focus a lot of attention on, so it’s important for the first impression to be a good one. 

Often, the tiles are a big focal point and if they’re a little outdated or not in the best state, a potential buyer may see that as a job that needs doing, which could put some people off. Not only that, with cleaner lines and a fuss free design, a glass splashback can really add a modern edge to a kitchen with minimal effort, as well as provide a more practical solution compared to tiles when it comes to cleaning.

Clean your windows!

OK, this one might seem like an obvious one, but it really can make a huge difference. Increasing kerb appeal is a massive thing when it comes to selling your house and the state of your windows is a big deal when it comes to this. You want the outside of your house to make the best first impression it can and as your windows are a big part of the exterior, it makes sense to ensure they look their best. But don’t just give the glazing a clean, give the frames a scrub too if you can! If they’re wooden frames, a fresh coat of paint or stain will definitely help. 

But it’s not just about the outside, making sure your windows are clean can have a big impact on the interior, too. It’s surprising how much natural light can be lost when windows are smeared or dirty, and if you hadn’t guessed already, natural light is probably one of the biggest things that will help sell your house. Check out our article on glass cleaning tips for what we think are some of the best ways to get those windows looking sparkly and fresh. 

Other ways to make your house more appealing

While products such as mirrors, splashbacks and glass shelves can help add appeal to your home for a relatively small amount of money, there are loads of other things you can do quickly and cheaply, so here are some of our favourite ideas:

Decorate in neutral colours – Give your walls a fresh coat of paint and provide prospective buyers with a blank canvas for their own ideas. While decorating to your own personal taste is great, it may not appeal to others.

Switch up your switches – This may not be something that even crossed your mind but replacing old light switches and plug sockets with new ones can be a great way to add to the fresh factor for not much money at all.

Refresh your front door – As we’ve already mentioned, kerb appeal really matters and while replacing your front door may not be a particularly cheap job, it can actually add value to your home, not only from an aesthetics point of view but from a security standpoint, too. If however, your budget won’t stretch to a new front door but you have a wooden one, giving it a fresh coat of paint will certainly help.

Add a shed to your garden – While it’s unlikely to add value, it can definitely be a selling point. Even if it’s just a little one, it will also give you somewhere to stash all of the bits and bobs that you’ve accumulated in the garden in the meantime – helping to make the most of the space on offer. 

We hope you’ve found our tips useful and good luck with the sale!

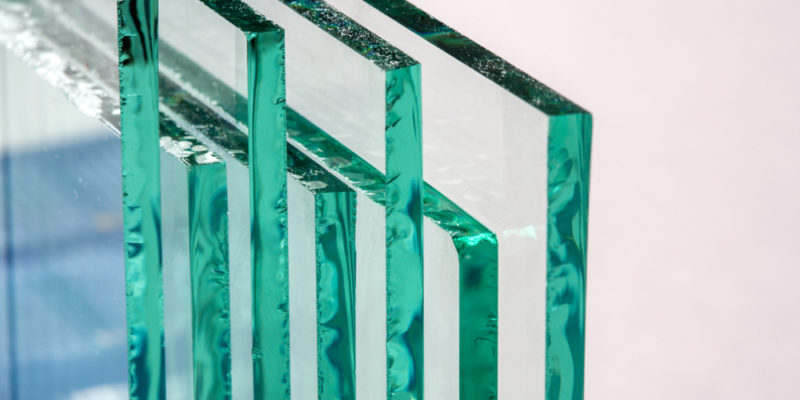
Sheets of glass with different thicknesses

The History of Glass: Where Did Glass Come From?

Nowadays, glass is something that most of us take for granted, there’s not many places we can go where it can’t be found. From glass bottles to mirrors, to mobile phone screens and of course double glazed windows – it’s proven itself to be an extremely versatile creation. 

But where did glass come from? When was glass invented?

While it might be one of the most widely used materials in the world, it’s also one of the most misunderstood. Many items we consider to be glass aren’t actually made of glass at all and are in fact a type of ceramic – having an entirely different manufacturing process to the type of glass we supply here at KLG. Glass products such as window panes, splashbacks and tabletops are usually called flat glass, or plate glass as it’s also known.

In this article we’re going to dip our toes into the history of glass production, flat glass in particular, and how it came to be such an integral part of our lives…

What is the History of Glass?

Not much is known about the first attempts to make glass, but it’s widely believed that glassmaking first became a thing over 4,000 years ago in the ancient Middle East region known as Mesopotamia (where Iraq, Kuwait and eastern Syria are now located). The ancient Romans were the ones to attribute the birth of glass to this area because the beach sands were known to be heavily used in this area for glass making. 

What is Glass Made Out Of?

It’s also believed that the ability to create glass was developed over a long period of time, with many experiments mixing silica (sand) and quartz with an alkali (soda ash) being the basis for early glass products.

There’s also a theory that glass making came to be as a result of other high heat industries such as pottery, where potters would use the mixture to create shiny, colourful glazes for their wares. But this is just a theory and no one really knows for sure. 

Where was Glass First Made?

What we do know is that the ancient Egyptians were the ones to eventually develop glass as a unique substance around 1500 BC. 

FUN FACT: Even though modern technology allows us to produce glass in much larger quantities these days, the initial recipe of ingredients needed for basic glass that was perfected in ancient Egypt, remains almost the same. If it ain’t broke, don’t fix it, right?

The eastern coast of the Mediterranean Sea became the centre of glass manufacturing, with Egypt and Syria leading the way. The raw ingredients would be melted together in a workshop to make ingots or raw chunks of usable glass that could be reworked and molded or slumped into different forms. Glassmakers also knew how to colour glass using metallic oxides such as cobalt and copper oxide – colourants that are still used today.

Glass making was a very slow process and for a long time it remained largely unchanged, that was until around 100 BC when a Syrian craftsman invented the blowpipe. This revolutionary creation made glass production easier, faster and cheaper. As a result, glass production flourished in the Roman Empire, spreading throughout all of the countries under its rule, especially Italy.

Fast forward a couple of hundred years to around 100 AD and the Romans of Egypt were starting to develop the first semblance of a flat glass window pane by rolling out hot glass onto a smooth surface. Up to this point, glass had been reserved for creating decorative items such as plates, bowls and jewellery, so the production of window panes was a huge turning point in glass production. Considered the ultimate luxury at the time, the windows were neither clear nor even, but they were good enough to serve their intended purpose. 

By 1000 AD, the city of Alexandria had become the epicentre for glass but by the 13th century, Europe had turned the production of glass panes into an art form. Stained glass windows were now becoming a popular sight in churches and cathedrals across the continent, with designs becoming more elaborate and ambitious as the technique developed. 

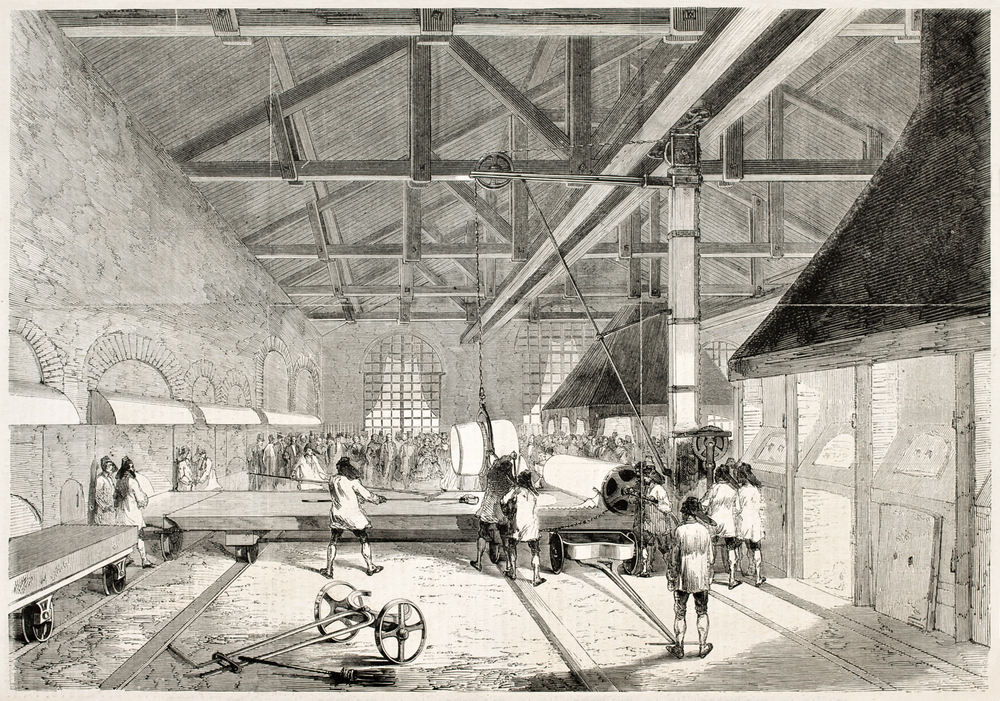
By the mid-1600’s, the French were starting to perfect a method for producing a product called “broad glass”. Long glass cylinders were blown, these were then cut and unrolled to form an almost flat rectangle. The rectangle was then ground and polished to create a clearer, more even pane. 

How Was Glass Made in the 1800’s?

By the late 1800’s glass was being produced and used in almost every building across the world. New additives were being put into the recipe which meant that huge cylinders of glass could be blown and then allowed to cool before being cut with diamond. The glass would then be reheated and slumped onto another piece of polished glass which helped to preserve the surface. 

Things changed at the beginning of the 1870’s when one Mr William Pilkington (you might recognise the name from Pilkington Glass) invented a machine which revolutionised the production of glass for commercial use, allowing larger sheets of glass to be produced at a quicker pace and for less money. It was the first of many innovative glass production inventions to come from the Pilkington family. 

Glass in the 1900’s

Glass manufacturing processes didn’t change much until the late 1950’s when another member of the Pilkington family, Sir Alistar Pilkington, invented the float glass process. This method was a huge turning point for glass production and paved the way for many of the processes we still use today. 

In the float glass process, molten glass (which reaches temperatures of in excess of 1000 degrees centigrade) is poured continuously from the furnace onto a large shallow bath of molten metal, usually tin. The glass “floats” on top of the tin (which has a much lower melting point), cooling as it spreads. The thickness of the glass produced is controlled by the speed at which the glass is poured.

Glass is much less expensive to produce this way and today, 90% of the world’s flat glass is created using the float glass process. Float glass is really versatile, too. Silver backing can be added to create mirrors, laminated glass can be made by adding a plastic interlayer between two sheets, and heating and rapid cooling creates tempered glass.

The history of glass is long and some of the earliest processes still remain today, making it one of the oldest crafts in the world. But if there’s one thing we know for sure… we wouldn’t be without it!

Obscure Glass - Privacy Glass from KLG Glass

Obscure Glass: Everything You Need to Know

There are so many benefits to installing obscure glass in doors, windows and even walls into homes and work spaces. They can be stylish, adding a decorative feature in-keeping with a minimalist design, or bringing embellishment to a professional environment. They can help you soak a small room in sunlight, magically making it appear twice the size and so much happier.

In fact, there’s only one drawback that people really imagine when it comes to lots of windows and transparent walls: loss of privacy. 

But you don’t have to sacrifice your privacy if you want to feature glass in your interiors. By using privacy glass, you can couple all the bright, beautiful benefits of regular glass and still keep out prying eyes. 

We’ve put together this FAQ to introduce you to the many possibilities presented by obscure glass, an option that many don’t even realise exists.

What is obscure glass?

Obscure glass is a very broad term that actually covers any type of glass that is not crystal-clear transparent. It is glass which ‘obscures’ the view through it, distorting or concealing what is on the other side, because of this it’s often referred to as privacy glass.

This obscuring effect can be achieved in a variety of ways, usually by use of a texture or pattern. It can range from offering complete privacy by obscuring the view completely or simply showing silhouettes. It can also be more of a style choice, that offers only a very mild distortion.

Obscure glass can be highly decorative and very practical. It is also versatile.

What types of obscure glass are there?

As mentioned above, ‘obscure glass’ is an umbrella term for many types of glass you may have heard of.

One of the most commonly seen types is frosted satin glass. This is glass that has been treated using chemicals to give an almost mottled effect on its surface. It is quite hard to see through, leaving only shadows and vague, fuzzy shapes visible through it. But is a popular choice because it also allows loads of light to flood through, allowing privacy without enforcing darkness onto rooms.

Another one of the most common obscure glass types is sandblasted glass. The ‘sandblast’ effect is created by using a powerful, high speed machine to pepper the surface of the glass with sand, walnut husks or a similar material to give a mottled surface that diffuses light and softens the visibility of anything on the other side.

Like frosted satin, sandblasted glass is a favourite choice among many people as it still lets lots of light shine through, while providing a good level of obstruction.

Here at KLG Glass, we also supply a comprehensive range of Pilkington textured glass, the added bonus of choosing a textured glass is that you can opt for patterns and designs to suit your tastes. It’s also available in a variety of privacy levels, depending on how obscure you’d like the view to be.

It is also possible to tint glass to obscure it, making it darker. This kind of glass can let less light through and will also make a strong design statement wherever it’s used.

Is there a difference between obscure glass and frosted glass?

As we discussed above, ‘obscure glass’ is an umbrella term that refers to a variety of obscure glass patterns, including frosted glass but not limited to it. This means all frosted glass could be called obscure glass, but not all obscure glass is frosted. 

There are options available that would still count as obscure. 

One of the attractive benefits of frosted glass types, is that you can embed designs, logos and embellishments, giving you complete control over the design. These can range from generic floral frosted glass patterns or unique company branding. 

Frosted glass is particularly popular in door panels, glass walls, balustrades and bathroom windows.

Sandblasted privacy glass from KLG Glass

Are there different levels of obscurity available?

By now you’ve probably realised that obscure glass is very versatile. You can choose between obscure glass windows or doors that are almost completely transparent, or ones that are completely opaque. As we mentioned before, Pilkington textured glass is available in 5 different levels of privacy, allowing you to decide on the best level of opacity for your requirements.

While some styles of obscure glass might be limited in how much flexibility is offered in terms of opacity, there are so many options across the range that you will always find a type of glass to suit your needs.

Is obscure glass different to opaque glass?

Obscure glass allows you to lower the visibility through a glass panel. Opaque glass sits right down at the very extreme end of that scale, and leaves the glass completely impossible to see through. And, unlike obscure glass, opaque glass won’t let any light pass through it either, though it is highly reflective. Opaque glass is most commonly used for things like kitchen splashbacks.

If you like the cool, clean lines that glass brings without wishing to compromise privacy at all, opaque glass could however be the perfect choice for you.

Can you ‘temper’ obscure glass?

Tempering is a process you can apply to glass in order to strengthen it. It involves heating the glass to very high temperatures, then exposing it to a very cold temperature. As the outside of the glass cools quicker than the inside, this creates ‘tension’ inside the glass which makes it very strong.

Tempered glass can withstand a higher level of impact without breaking. It also shatters in a certain way, breaking down into crumb-like pieces rather than jagged shards. This means that as well as being stronger, it is safer. 

This process is commonly used for large glass panels, such as those in full length windows, doors and furniture, to make them safer. 

Obscure glass can be tempered just like other glass, and often is. If you are choosing obscure glass to place in a window, door panel or similar setting, you would definitely be better off having obscure glass that is tempered.

Where can you use obscure glass?

The flexibility and versatility of obscure glass mean you will find it at home in a whole host of settings. You can bring light and space to your narrow hallway while still keeping your home secure, by placing an obscure glass panel in your front door.

Or you could give workers a lighter, brighter, cheerier space to work while still allowing them their privacy by installing obscure glass walls in an office, the possibilities are endless!

One of the most popular places to use obscure glass is in bathroom windows. In a space where your privacy is paramount, choosing obscure glass allows you to maximise the light in the smallest room of your house, while maintaining a sense of seclusion and safety.


Creative Ways to Use Glass Shelves

Glass shelves are a beautiful feature to have in your home. The biggest thing they offer is the ability to allow light to flow through, they’re also a great way to add new dimensions to a room. A classy feature that’s surprisingly low maintenance, durable and most of all, functional.

If glass shelving isn’t really something you’ve considered, or you’re not really sure how they’d work in your home, in this article we’re going to explore some of the creative ways that you can use them to maximum appeal. And don’t forget that they can be frosted, tinted and coloured too, so the possibilities for personalisation really are endless…

Glass Shelves as a Partition Wall

A glass partition wall is a great way to divide a space if you have an open plan living area. Using glass shelving to separate space means you don’t have to compromise the flow of natural light, but still allows you to have designated spaces for different uses. 

A glass partition wall is perfect for separating your living area from your kitchen for example. Or, if you use a portion of a room as a work space, being able to completely remove yourself from the area at the end of the day, means you’re more easily able to wind down.

Glass Shelves Across a Mirror

Glass shelves have many purposes, but using them across a mirror may not have come to mind. We aren’t talking about installing glass shelves across a full-body length mirror, we’re talking about using a mirror as a backing to a shelving unit.

Glass shelves placed across a mirror creates the illusion of a bigger space. It also allows light to bounce off the many glass surfaces resulting in a much brighter area.

You can display many products on a glass shelf, with the mirror behind it adding a touch of glitz to your space. This works particularly well in bathrooms where strategic lighting can really add a sparkle to the many reflective surfaces.

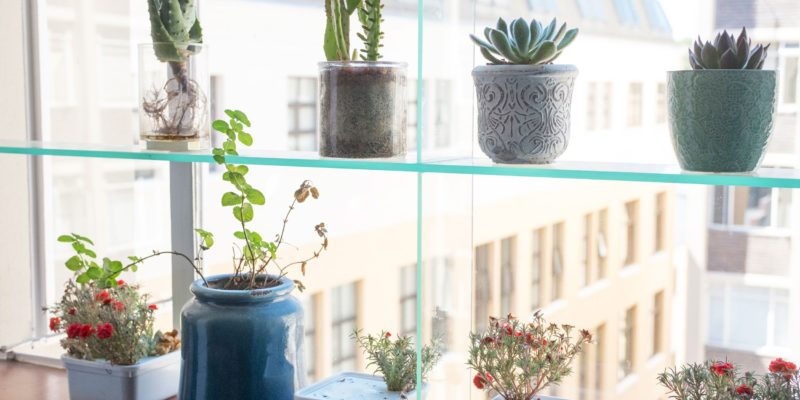
Glass Shelves Across a Window

Installing glass shelves across windows will instantly maximise storage space without having to compromise on natural light. Perfect for displaying plants and flowers, this is also a great place to display a few items of glassware. 

On sunny days, the glassware will refract the light, sending beautiful patterns dancing about your home as the day moves along. 

Hanging Glass Shelves

If a statement piece is what you want, then this is the one for you. Hanging glass shelves from the ceiling is a great way to “lift” a room and makes use of space that would otherwise remain empty. Strategic placement of hanging glass shelves can really add a focal point to a room. 

You could even create a partition wall with hanging shelves if you’re looking for a more designer, futuristic approach to your interior. 

Floating Wall-mounted Shelves

If a minimalist, clean look is where things are at for you, then a simple way to make use of glass shelves is to fix them to your wall as if to appear unsupported. Floating shelves look beautiful, especially if made from glass and the clean, crisp lines mean that whatever you display on them will get maximum attention. They add texture and dimension to a room without obviously standing out.

Glass Shelves as a Wall Feature

Create a wall feature by using coloured glass shelves. If your house is minimalistic in design, adding coloured glass to your walls will add vibrancy and texture. Using glass as opposed to other materials lends itself well to simplistic interior design as it’s subtle and uses natural light to its fullest.

Using Glass Shelves for Organisation

Coloured glass shelves are ideal for organising household items in a sleek and stylish way.

Add coloured glass shelves to your kitchen cupboards. Trade in that dusty old wooden bookshelf for a sleek glass one, or convert that cupboard under the stairs into a stylish walk-in wardrobe, where all your favourite shoes can be displayed and cherished as if you’ve just walked into a designer boutique.

On the other hand, if you still want to keep a touch of nature in your home, glass shelves work wonderfully when combined with a natural wooden frame. The glass shelves add a lightness while the grains in the wood remain a prominent feature – the best of both worlds some may say.

Glass shelves are becoming increasingly popular in modern homes, but they also work really well in older properties where maximising natural light can be somewhat difficult. There are many ways that you can utilise glass shelving to get the exact look and feel you want without having to compromise on practicality.

So, whether you want to use your shelves as a statement piece or as a place to store items, investing in glass shelving should definitely be on your spring DIY list. 

For glass shelves in a range of colours and styles, all custom made and cut to your preference, visit our glass shelving page and take a look at the sort of things you can do, the only limit really is your imagination!

Laminated Glass Vs Toughened Glass – Which Should You Choose?

Laminated glass and toughened glass are two types of safety glass. Often, people are mistaken when it comes to the differences between the two, or they believe that they’re the same thing. In actual fact, they’re very different, and are used for different purposes – even if they do look the same.

Safety glass is typically used on external windows and doors, glass balustrades, glass shelving and vehicle windows. Essentially, it’s used anywhere that it could cause immediate injury if broken.

Safety glass is usually toughened or laminated, but you can also find other variants too, such as wire mesh glass. These all offer the same end result in terms of protection from injury but they’re created differently and used for a variety of different products.

What is laminated glass?

Laminated Glass - KLG Glass

Laminated glass consists of 2 sheets of glass that have a layer of plastic sandwiched between them. This layer of plastic is called polyvinyl butyral. Polyvinyl butyral acts as a barrier between the 2 sheets of glass and prevents them from breaking into shards or shattering into little pieces. The resistance to penetration provides additional security and the added layer also offers ultraviolet light protection, so prevents fading from sunlight.

Is laminated glass tempered?

Laminated glass and tempered glass are two different things. Tempered glass is standard glass that has been heat-treated to make it more durable.

Is laminated glass more secure?

As laminated glass has a layer of polyvinyl butyral between two sheets of glass, it makes it an incredibly secure glass-type. This material is used externally to heighten security which helps prevents break-ins.

Can laminated glass be cut?

Laminated glass can be cut to size. It is tricky to do though, and requires a professional to do it. Laminated glass can also be etched and sandblasted with your choice of design, unlike toughened glass.

How does laminated glass shatter?

Laminated glass doesn’t shatter. If laminated glass receives heavy impact, the glass will break however the plastic holds the glass in place. Removing any danger from broken glass.

What is laminated glass used for?

Laminated glass is typically used anywhere that human impact may occur and falling glass could add further danger. Laminated glass is used for:

  • Car windscreens
  • Glass floors
  • Glass balustrades
  • Full length internal and external windows and doors
  • Skylights
  • Public spaces where glass is used such as bar shelves and shop windows

Laminated glass isn’t as strong as toughened glass on initial impact, however it’s advantage over toughened glass is that it won’t fall to pieces when hit. The plastic sheet between the two sheets of glass acts as a barrier and will hold the glass in place until a replacement is found.

What is toughened glass?

toughened glass - KLG Glass

Toughened glass is similar to tempered glass and follows the same strengthening process. However it’s much stronger. Toughened glass is designed to shatter into “break safe” fragments rather than shards, reducing the chances of injury.

Toughened glass is heated to high temperatures and then rapidly cooled to solidify it. It can also be heat-soaked and laminated if necessary.

Is toughened glass fire resistant?

Not all toughened glass is fire resistant. Standard toughened glass isn’t. You shouldn’t use toughened glass for doors if the door is a fire exit. However, you can purchase toughened glass that has been specifically designed for this purpose.

Can toughened glass be cut?

Toughened glass can be cut. And, like laminated glass, toughened glass can be cut to size, but not in the conventional sense.

Toughened glass cutting is a long and lengthy process. The glass must be heated to 500-degrees Celsius and slowly cooled. Once cool, the glass can then be cut. However, we recommend that any toughened glass is made to measure in the first instance to prevent issues.

How strong is toughened glass?

Toughened glass can be shattered with impact; it breaks up into hundreds of tiny pieces rather than shards, meaning it’s less likely to cause injury. However, the material is incredibly strong.

Toughened glass is stronger than you might think. For perspective, toughened glass is 5 times stronger than standard glass.

Can toughened glass be recycled?

Toughened glass cannot be recycled. Toughened glass has a much higher melting point than any other glass. If you recycle toughened glass there will still be large portions of unmelted glass which then causes quality issues for manufacturers.

What is toughened glass used for?

Toughened glass is used in places where human injury needs to be reduced, this is primarily for public services and public buildings. Toughened glass is used for:

  • Phone booths
  • Bus stops
  • Glass shelves
  • Splashbacks for kitchens
  • Showerscreens

Toughened glass is the strongest form of glass. When compared to laminated glass, it takes a lot more force to break toughened glass than it does laminated. However, when toughened glass is broken, it will shatter into hundreds of tiny pieces.

Toughened and laminated glass are incredibly durable and provide safety to yourself, loved ones and the public. They are both created to prevent harm coming to human life if broken.

Which type of glass that you use largely comes down to personal preference. Both types of glass have their pros and cons and both are suitable for use in critical locations in the home. If you plan on using one of these glass-types, but you’re not sure which type would be best for you, please don’t hesitate to give us a call.