Glass Balustrades: A Useful Guide

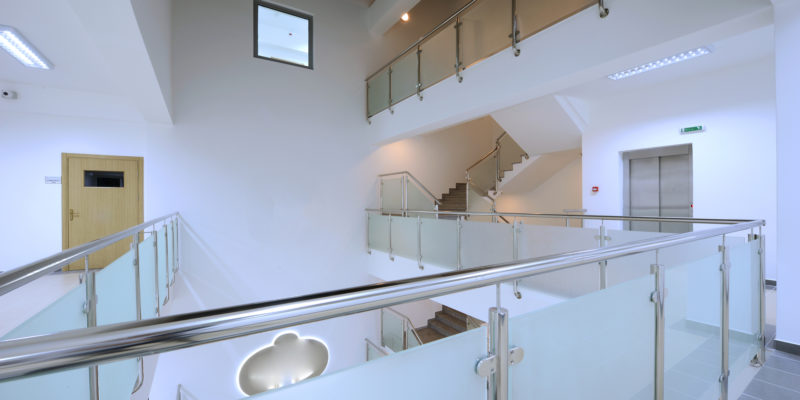
You may not be aware of it, but you probably see glass balustrades way more frequently than you realise. They are actually a common architectural feature, protecting people on staircases or at heights.

But the word ‘balustrade’ may seem quite intimidating and definitely suggests a complicated design item. To clear this up, we’ve put together this post to help you get to grips with what a glass balustrade is, where they can be used and why you would want to use them.

What is a Glass Balustrade?

The word ’balustrade’ may seem unusual and formal, but is a technical term for something that is almost everywhere.  It is basically defined as a rail that is supported by pillars, posts or panels (which are technically called balusters). This means that railings, banisters and handrails are actually all types of balustrades. And these really are common.

Obviously, a glass balustrade in particular is one that features glass, usually in the supports beneath the rail, but not exclusively.

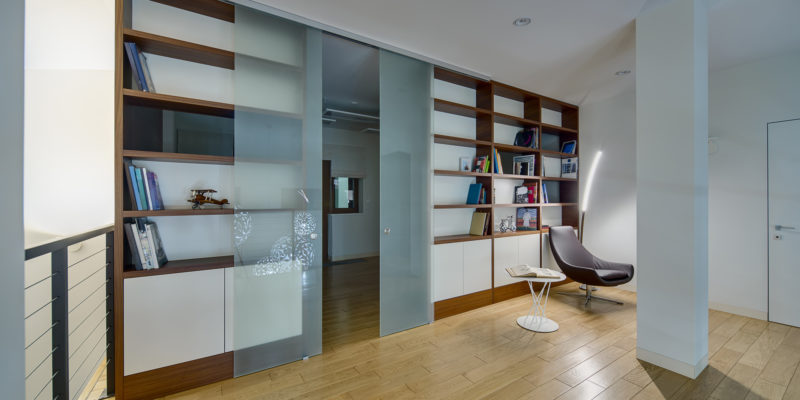
There are two primary types of glass balustrade. Most commonly, glass panels can be used to fill the space between posts and rails, but they can also be left to stand alone. That leaves the edge of the panels to form the ‘railing’.

These ‘freestanding’ balustrades are called ‘structural’ or ‘cantilever’ and are perfect when you don’t want a handrail and prefer a completely clear surface. Choosing a structural balustrade has a lot of visual benefits, but it will also have big impact on the type of glass that you can use.

What type of glass is used for balustrades?

As one of the main purposes of balustrades is to ensure safety, there are quite a few recommendations around what glass should be used to construct them.

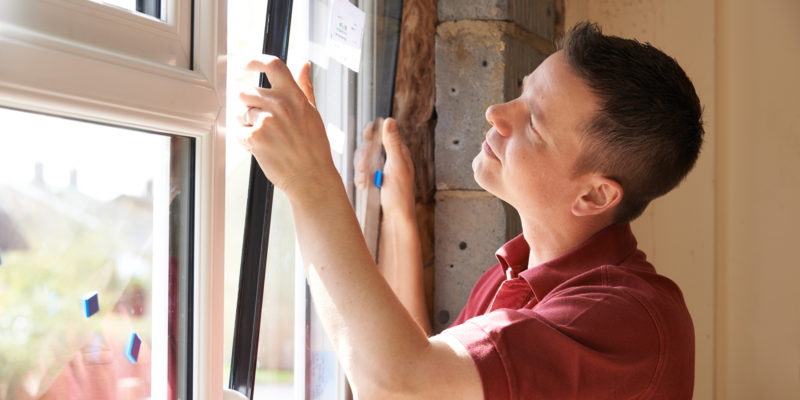
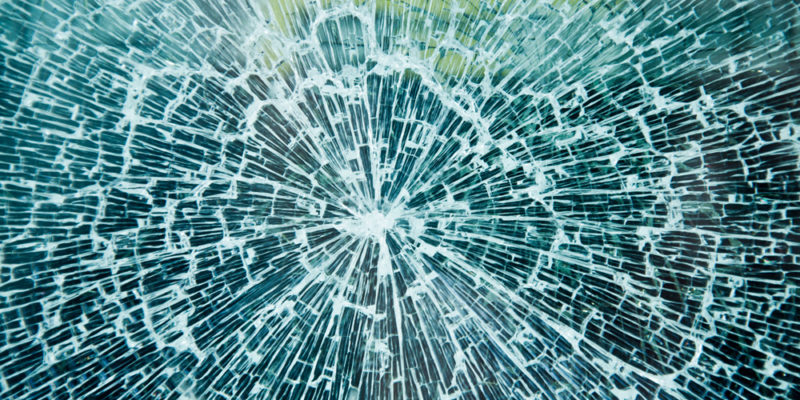
Firstly, you can only use toughened or tempered glass. This means it has been treated with extreme heat in order to strengthen it. This robust, safety glass can be up to five times stronger than glass that is untreated. The glass tempering process should also ensure that if it breaks, it shatters into smaller granular pieces, rather than sharper, ragged shards.

Laminated glass can also be used for balustrades as it provides extra protection from breaking. Laminated glass has a very thin layer of plastic sandwiched between two slim panes of glass. Though you can’t see this wafer-thin sheet of plastic, it helps the glass hold together if it gets broken.

Another big constraint on balustrade design, is how thick should a glass balustrade be? In most cases, around 10mm thickness is needed for balustrades which also have posts supporting them and at least 15mm thickness is needed when used for structural or cantilever balustrades. Regardless of the thickness, any glass will always need to be toughened or laminated.

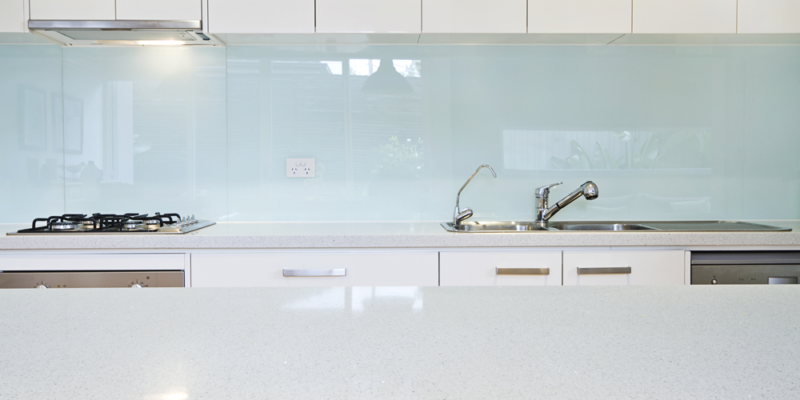
Both types of panels can be finished in a range of ways. For maximum clarity, space and light, they can be left clear. Alternatively, they can be tinted with colour, frosted or sandblasted glass can also be used to incorporate logos or a bespoke design.

A lot of specifics around the type of glass you need, will depend on where it’s being used and the structure around it, so it always advisable to check the needs of each particular project.

Where Can Glass Balustrades be Used?

Almost anywhere you want a glass balustrade, you can find one to fit. Whether it’s internal or external you can choose to use:

  • For stairs, to bring safety and space to your interior
  • Around decking or partitioning off garden space
  • On a balcony, to provide uninterrupted views across the landscape
  • Around a patio area, to free your garden from harsh lines
  • As a pool surround to help you feel freedom while you swim

Benefits of Glass Balustrades

Glass balustrades are a highly popular choice for both internal and external design. This isn’t surprising when you see how many benefits they have!

Safety

The thick, tempered glass commonly used in balustrades is incredibly safe. Treated to make it almost as strong as steel, this glass hardly ever breaks making it a great choice for family homes or busy offices.

Maximise light and space

The transparency of glass brings a whole range of design benefits to a building. Being able to see straight through a space will maximise its size, making it feel roomier and more open. It will also allow light to flood in, which helps the room feel even bigger and brighter!

Easy to clean

Wide, smooth panes of glass can be swiped with a soft cloth and cleaned in minutes. Compared to the intricate designs you find on balustrades made from wood or metal, which require fiddly dusting, polishing and primping, the smooth surface of glass is a dream to maintain. Our glass cleaning top tips blog post should also help.

Durable

As well as being secure and safe in the short term, glass balustrades age brilliantly too. They won’t warp or rot and can withstand exposure to extreme elements. They can’t be infested by pests or gnawed by pets. They won’t fade in colour, or age in texture and if maintained correctly, will look sharp and smart for their entire life.

Eco-friendly

You might not realise it, but glass is a really environmentally-friendly material. Its durability means it lasts for ages and won’t need major updates or modifications in its long life. Plus, if the unthinkable happens and you decide to remove the glass, this material is often recyclable and easy to dispose of!

Look amazing!

Obviously, the biggest benefit to glass balustrades is their beauty. Their stylish simplicity will match brilliantly with a minimalist, modern decor but they are also incredibly versatile. Their ability to maximise space can help to open up dark, dingy spaces into bright, beautiful ones.

Despite having a rather daunting name, balustrades are actually all around you, and feature in almost all buildings with two or more floors at least once. When picking a material to make them from, glass is not just a stylish choice, but a smart one too.

You can install glass balustrades in a range of places, happy in the knowledge that they are safe, secure and long-lasting. So, if you’re thinking of updating or improving the look of your property, re-think your existing balustrades and give glass a go!

Glass Cleaning Top Tips

For many, there is one cleaning chore they dread above all others: washing windows and glass doors. It’s such a time-consuming task, with multiple windows in every home and two sides to every window. It can also feel pointless, when you pour hours into a painstaking wash, only to find your windows are still streaked or smeared.

In this article, we’ll take a deeper look and hopefully answer some commonly asked window-cleaning questions.

What is the best homemade glass cleaner?

When it comes to cleaning glass, often a homemade solution is best. A mixture of soap, water and vinegar is commonly accepted as a brilliant glass cleaner because it breaks through grime and minimises streaks just as effectively as shop-bought brands.

And these raid-the-cupboard mixes are not only super-effective, they’re cheap and adaptable too. You can play with the proportions or add extra ingredients such as essential oils or even cornstarch to maximise their effectiveness.

If you’re looking for a good base, our preferred glass cleaning solution is as follows:
● 1 part rubbing alcohol
● 1 part vinegar
● 8 parts warm water

These aren’t your only common household window cleaning options though. People often ask can you use washing up liquid to clean windows? The short answer is yes, though it works best as a prewash. Soap a particularly grimy window with a mix of washing up liquid and water, then rinse with a vinegar/alcohol solution to help minimise streaking.

Another common question is; can you use malt vinegar to clean windows?
This answer is more nuanced. If your glass is smoked, or a dark colour already, then you are fine to use malt vinegar but in general white vinegar is best for window cleaning. ‘White’ vinegar is actually clear so it shouldn’t stain the glass.

What is the best way to clean windows without streaking?

When you’ve spent all that time washing your windows, it is frustrating to find the glass is still stained by streaks after it dries. This can often be traced to two common mistakes, either using too much detergent or leaving too much water behind.

Luckily, with the right tools and the right steps, it’s easy to achieve a streak-free finish. To start, assemble these items, as well as your bucket and your cleaner:
● a sponge
● a squeegee
● a towel
● a dry microfibre cloth

Now, with all the tools you need close to hand, follow our streak free glass cleaning tips:

1. First mix up your glass cleaner of choice according to instructions.
2. Spritz your window with a small amount of cleaner and leave for a couple of seconds to work.
3. Swipe the squeegee across the surface of the glass. Start at the top of the window pane, and snake your way down with strong, steady strokes. The pressure here is key. If you’re too soft, you’ll leave water behind, too hard and you’ll find it difficult to move the squeegee.
4. After each swipe, run the squeegee over the towel to clean the dirty washing liquid away.
5. Wipe the edges of the window with a dry microfibre cloth or rag. You can also use this to rub away at any stubborn finger marks or spots. Just make sure you keep the cloth dry – if it gets damp it will leave streaks on the window.
6. Finally, take your towel and rub the windowsill down to catch any water that dripped. This can be a dirty job, so it doesn’t matter if the towel is already damp.

And here are our final glass cleaning tips to ensure your windows stay streak free:

● Try not to wash your windows when the sun is shining directly on them – they’ll dry too fast.
● Pick an appropriate sized squeegee for the window, it will help you make steady contact with the glass.
● Resist the urge to whip out the pressure washer, at best they’ll give you an uneven wash and streaky finish. At worst, a high pressure will damage the window.

What is the best cleaner for glass shower doors?

Just like dishes, clothes and cars, shower doors are thankless things to clean. Not only are they tough to get spotless, they usually get dirty again quickly.

With shower doors, the film of grime that dulls the glass is usually a mix of hard water and soap scum. Unfortunately, this build-up can do permanent damage, etching into the surface of the door to form clouding. No amount of washing will clear that.

The safest thing is to stop the scum forming. There are a range of home remedies for this, such as applying a small amount of car wax or furniture oil to protect the surface. Another good prevention strategy is to invest in a shower squeegee. These only cost a couple of pounds and the thirty seconds spent sluicing the water off after a shower, will keep your door cloud-free for longer.

But, for those who don’t have the patience or the dedication for regular maintenance, here are our tips for cleaning glass shower doors:

● Smear a paste of baking soda and water across particularly stubborn patches. This will weaken the scum build up, and a gentle rub with a damp sponge should be enough to get it all clean.
● Spritz white vinegar to stop streaks: it really is a miracle glass cleaner!
● Change your bathing habits: the worst culprit for scum build-up is bar soap because it usually contains talc. Next time you’re shopping for shower supplies check the ingredients on any bars you buy and pick one that is talc-free.

How do you clean leaded glass windows?

When it comes to leaded glass, don’t risk a generic commercial cleaner. Shop-bought solutions often include ammonia which can have a damaging chemical reaction with the lead ‘cames’. ‘Cames’ are the metal strips which run through the window, holding it together. To prolong their life, the best thing to use is simply warm water and a ph-neutral soap or washing up liquid.

Make sure you’re gentle with your cleaning, as leaded windows are often fragile and expensive to repair. While cleaning, you can also check the state of the cames as well. If any white powder has formed on the surface of the lead, this means it’s oxidised and will need replacing.

It’s easy to underestimate the impact a dirty window can have on the appearance of a house or room. Not only does a sparkly clean pane of glass have its own visual pleasure, it’s surprising how much extra light can be let in. Hopefully, this guide will have lessened the innate dread of window cleaning, and help you have crystal clear glass every day.

The Benefits of Double Glazing

The first two questions we are usually asked about double glazing are, “how much money will it save” and, “can double glazing reduce noise?” The answers are, “more than you think” and, “yes, absolutely!” it really is a wonderful invention. But why is double glazing so good?

Double glazing doors and windows have made our homes warmer, quieter, more energy efficient, and have even given us a welcome added layer of security! Here at KLG we offer a huge range of double glazing units to meet individual requirements for trade and retail customers. Not convinced yet? Let us tell you more about this game changing invention.

How Are Double Glazed Windows Made?

Double glazed windows are made by taking two panes of glass separated by a spacer bar and sealing them together into a single unit. The gap between the panes is filled with a gas before the unit is hermetically sealed (which means the gas cannot escape and no air can get in). The gas used varies, sometimes it’s just dehydrated air, but the most commonly used gas today is Argon.

Filling the cavity between the panes of a double glazed unit with dehydrated air or gas has the effect of reducing thermal and acoustic conductivity. This is because in this state, the molecules of the air or gas are much less mobile and so much poorer at transmitting sound or heat.

Here are some key facts about the history and construction of the double glazing unit:

  • Who invented double glazing? We don’t know exactly who invented double glazing, but it is thought to have originated in Victorian Scotland by chilly innovators attempting to combat the harsh winters. We do know that the idea found its way to the USA in the 1930’s when the ‘Thermopane’ was developed by an inventor called Haven. It wasn’t until the 1970’s that double glazing as we know it today became popular in the UK.
  • Why are double glazed windows filled with argon? Double glazed windows are often filled with Argon because it has 34% lower thermal conductivity than air, making it much more efficient. Other gasses are even better than Argon, but they cost a lot more so aren’t often used. The cost of double glazed windows filled with Argon is only about 5% more than those filled with dehydrated air.
  • Is there a vacuum in double glazing? There is not a vacuum in double glazing. Technically speaking, a vacuum is the complete absence of matter and as gas is a matter, the gap between the panes of a double glazed unit is not a vacuum. However, the cavity is filled under vacuum conditions and the resulting space is often vacuum-like (meaning it is sealed at a lower pressure).
  • What is the standard thickness of double glazing? The standard thickness of double glazing varies somewhat according to whether the unit is designed for thermal insulation or acoustic insulation, but generally the cavity width for standard double glazing windows is around 16mm.

How Much Money Can You Save With Double Glazing?

The money saving effect of double glazed windows primarily comes from how effective they are at conserving heat, and this depends on what we call the U Factor (sometimes referred to as U Value). The U Factor measures the speed with which a window transfers heat, and therefore how well it insulates.

  • What is a good U Factor for a window? A low U Factor indicates a low rate of heat transfer and therefore a window that insulates well; glass with a U Factor of around 1.2 is a good rating for a window.

    To make things a little simpler, in the UK the efficiency of double glazed windows is rated A – G (A being the most efficient) and this rating takes into account the U Factor of the glass as well as other elements of the window’s construction such as types of frame (wooden frames are good insulators while uPVC frames have a longer lifespan).

  • What is the average cost of double glazing a house? Well in order to work that out, we need to factor in the cost of actually installing double glazing in the first place. The cost of double glazing will depend on the quality of the product you purchase, but the average cost of double glazing a house in the UK is between £3000 – £5000.
  • How much money will double glazing save? Again, it depends on the quality of the double glazing, but an A rated installation in a semi-detached house will save you around £120 a year. This means a £3000 installation would pay for itself in 25 years. However, it’s also important to factor in other long term savings and gains. For example double glazing will help to protect against future energy price hikes, will make your home more secure, and will add value to your property that you can recoup when you sell.
  • Is it worth putting in double glazing? We think the financial argument alone makes the case; it’s a good investment that will likely pay for itself whether you stay put or sell up, and it’ll give you a much better standard of living in the meantime. This, plus the environmental benefits of double glazing, make it a no-brainer as far as we’re concerned!

How Long Does Double Glazing Last?

Generally, we reap the benefits of double glazing, such as saving money, better insulation and lower environmental impact over the long term. This is usually fine because double glazing units, particularly those with uPVC frames, have a long life span, and a good double glazed window should last around 25 years.

However, they aren’t indestructible and it is possible for them to fail. Whether you need to replace the entire unit though, or simply repair an element, depends on the extent of the failure. Here are some of the more common failure points to watch out for, along with some of the repairs to double glazing you can make:

  • What causes condensation in between double glazing? When water vapour hits a cold surface, condensation occurs. If you’re seeing condensation on the inside pane of your double glazing, the temperature of the glass is too low for the room. You could switch to a more thermally efficient window to raise the temperature of the inside pane, but the problem will most likely be solved by simply improving the ventilation around your home, or using a dehumidifier. Condensation in between double glazing is caused by warm air getting into the cavity, which means your seal is no longer airtight. This is a problem because double glazed sealed units cannot be repaired, so you will require a double glazing unit replacement.
  • Can double glazed sealed units be repaired? As your double glazed windows age, it is not uncommon for a sash to drop or hinges to become worn. If you notice air or water coming in around the sash, it may be that the window no longer closes properly. Use a credit card to check for gaps around the sash and replace hinges or adjust the sash accordingly until the seal is tight again. If the sash looks flush, it may be that the weather seal around the glass unit has gone. This can be replaced but you might consider upgrading your double glazing at this point to the latest standard. Finally, if you can feel a draught between the brickwork and the frame, it’s likely that the sealant has perished. You should be able to fix this by simply filling the area between the wall and the frame, or hiring a professional to do it.
  • Can you just replace the glass in double glazing? If your glass is scratched, you will probably be able to polish out the imperfection relatively easily. If you have more significant damage to your glass work, such as a crack or a hole, it will need replacing, as sooner or later the gas cavity will be compromised. The good news is you can just replace the glass in double glazing, so this won’t be a complete refit. Similarly, anything more than cosmetic damage to the frame will also leave the glass, and your security vulnerable, so replacing the frame might be your only option.

But don’t let this talk of failures and repairs put you off; today’s double glazing units are stronger, better and more effective than ever before and will almost certainly come with a guarantee. They are built to last, and are arguably less likely to fail than single-glazed alternatives due to the huge development and investment they receive from the industry (only 7% of households in the UK now have no double glazing).

We hope our guide through the history, construction and benefits of double glazing has convinced you that it really is an investment worth making. Why not take a look at our huge range of double glazing solutions and see how we can start saving you money today?

What is Glass Sandblasting?

Here at KLG, we’ve been asked on more than one occasion “what is frosted glass made of?” And well, the answer’s in the question; it’s plain old glass. But the difference is that it’s glass that’s been sandblasted.

“Sandblasting” is one of those terms that pretty much is what it sounds like. It’s the process of blasting sand particles at high speed to abrade a smooth surface. So what is sandblasting used for? Well it can be used to etch patterns onto a surface, to clean certain metals, and when used with glass, sandblasting takes the clarity out of the surface and makes it opaque.

You’ll have probably seen sandblasted glass windows in bathrooms and front doors where the privacy of opaque (or ‘frosted’) glass is useful. But at KLG, we’ve taken sandblasted glass designs to a whole new level, from matching wallpaper patterns to bonded glass trophies and everything in between.

How is Sandblasting Done?

The concept is fairly straightforward, but what is the process of sandblasting? It basically involves the sand particles being propelled along a tube on a high-speed current of air. The sand shoots through a nozzle at the end of the tube, hitting the glass and corroding the surface, leaving a milky white opaque look to it. Different etching effects are obtained by varying the amount of sand used, the speed of the jet and the nozzle at the end of the tube.

The amazing patterns and detail you often see in sandblasted panes is created by simply ‘masking off’ the areas of the glass you don’t want affected by the sand with an adhesive vinyl. The masked off areas are not susceptible to the sand blasting, so remain crystal clear.

There are two main approaches to how sandblasting works: suction/syphoning, and pressure. The suction method simply sucks the sand into the high-speed air stream, whereas the pressure system uses a pressurized container to shoot the sand through the nozzle. Generally, pressure set ups are more powerful and so produce results more quickly, but they also tend to be more expensive.

In addition to the standard blast hose and nozzle jet (which looks a little bit like a heavy duty pressure hose), you can also use a blast cabinet. Cabinets are great because all the sand particles are contained inside so there is less to clean up, and you don’t generally need to wear protective clothing as you’re operating the machinery in a sealed box. However, there are obviously limits to what you can fit inside one!

And it’s not just sand that’s used either. There are lots of other abrasive materials that can be used for blasting, such as crushed walnut or coconut shells, and actually this is often preferable as silica sand (the traditional medium) can cause silicosis of the lung.

There are other ways in which to etch glass, which involve using acids and creams, but as these techniques involve extremely hazardous materials and don’t offer the same range in technique or effect, sandblasting is now the more common approach.

Where Can You Use Frosted Glass?

Although frosted glass works brilliantly in bathrooms for privacy in shower screens, windows and glass doors, it can be used in lots of other places around the home too. Here are a few examples to get you thinking:

  • Mirrors can be sandblasted on the back when being fitted with lighting or have patterns sandblasted onto the front.
  • Balustrades and partitions look great with patterns sandblasted onto them (we can even match these to your wallpaper design).
  • Doors with glass panes in double glazing units can be sandblasted for privacy or patterned for decoration. You could even have the name of your house etched into a window above your front door.

And it’s not just around the home that frosted glass can be useful; having logos or motifs etched onto doors, windows, table tops and signage can be a wonderful and practical addition to the workplace as well.

Sandblasted Glass Designs

We mentioned earlier how the patterns on frosted glass are achieved by masking off the areas that need to remain clear with adhesive vinyl. Once you appreciate that the vinyl can be cut to order, you begin to realise the possibilities for designs are practically endless! A quick search on Pinterest will bring up a huge range of beautiful sandblasted images, some bold and simple, some intricate and sculptural.

Contemporary trends lean towards complex patterns and varied gradations of depth in the glass to create a shading effect and some amazing 3D designs. The more intricate a design, the more expensive it will be, but here at KLG we have a large range of bespoke patterns and designs available for all budgets that will meet contemporary as well as more traditional tastes.

What is The Best Way to Clean Frosted Glass?

What sandblasting does is create a beautiful effect on the surface of our glass whilst still letting 97% of the light pass through. However, it also leaves an uneven surface that can trap dirt, so regular cleaning can be important.

Most sandblasted glass will have a protective coating applied to it before it leaves the workshop which will help provide you with long-lasting protection against grime and knocks, but it also means you have to choose your cleaning products carefully. If you choose to use a commercial cleaner, ensure that is not alcohol, ammonia or isopropanol based, as these types of cleaner may remove your protective coating.

We’d recommend making your own water-based glass cleaner with some clean, clear water and a little detergent (think a weak bowl of washing up water). Then simply use a soft, lint-free cloth in a consistent, uniform pattern to avoid distracting smears.

Sandblasted glass can offer a really contemporary look to your home or workplace, as well as some very practical privacy. If you’ve not considered using it before, take a look at our range and see if we can inspire you to bring a little extra beauty into your space.

White Glass Splashback Kitchen

Glass Splashbacks – Your Questions Answered

Sitting at the rear of your work surface, glass splashbacks are designed to protect kitchen walls against moisture, heat and food debris when cooking. We’re not just talking about the obvious spots that you clean up after each session either; the tiny water molecules that would otherwise seep into the wall unseen can cause structural damage over time. Due to their protective nature when it comes to moisture and heat, glass splashbacks are ideal for use in bathrooms too.

Glass, naturally, is a fantastic material for splashbacks. The protection offered by a good splashback, can in the long run, save you considerable amounts of money in remedial building costs. And with an endless array of colours and designs available out there, we’re certain you’ll be able to find one to match your kitchen or bathroom.

But not everyone is familiar with what they’re all about, so we at KLG Glass wanted to answer some of your questions. So, let’s explore splashbacks in a little more detail and discover how they’ll benefit your home.

How are Glass Splashbacks Made?

Glass splashbacks are made from toughened glass – or tempered glass as it’s often known. Glass of this sort is heat-treated for additional strength. It’ll therefore be able to absorb a bit more punishment and heat before they break.

Toughened glass is around five times as strong as normal glass, and, since the exterior is at a slightly different tension to the core, it’ll shatter into tiny, blunt fragments as opposed to shards if it’s smashed. This makes it a safe choice as well as a stylish one.

Is it Possible to Cut a Glass Splashback?

While it’s possible to cut into tempered glass, we wouldn’t recommend it. Once your saw passes through a certain point, the tension between the interior and exterior of the glass will instantaneously resolve – causing it to shatter. In other words, do not cut into your splashback. In doing so, you will ruin it! We would always recommend having a tempered glass splashback made-to-measure, this will eliminate any sizing issues and mean that you’ve got exactly the right size for the space it’s designed for.

Can Glass Splashbacks be Used with Gas Hobs?

Glass splashbacks will work perfectly well with gas hobs, provided that there’s a decent gap between your hot pots and pans and the surface of the glass. As a general rule of thumb, this should be 110mm or more, as measured from the rear of the hob. Repeated cycles of heat and cold will cause the glass to crack, so it’s best to keep the distance between the two as wide as possible.

A gas hob also requires plenty of space on either side. So if you’re looking to install one in a chimney breast for example, 300mm from each wall is a recommended minimum when installing alongside a glass splashback, but for best results you should consider 500mm or more. You’ll also need to be sure that there’s a little space in front so that passers-by aren’t at risk of knocking pots and pans off. If you can’t accommodate your hob without a decent gap around the front, back and sides, then it’s time to consider a smaller hob.

How are Glass Splashbacks Fitted?

Before you even think about installing your splashback, you’ll need to measure up. This means deciding exactly where the splashback is going to be by accurately recording where the cupboards, cooker hoods, sockets and switches are going to be fitted . You’ll need to leave a little bit of room for marginal error here, since altering the size of the glass after it’s been tempered will be impossible.

You can fit your splashback in one of two ways.

  • Screw Fixings
  • Adhesive Fixings

If you elect to secure your splashback with screw fixings, then ensure that the appropriate holes are drilled before the glass is tempered. You should also be careful not to over-tighten the screws, as doing so will risk damaging the glass, which could cause it to crack later down the line. Screw fixings will always be visible, and thus you’ll need to position yours carefully if you want to disguise them.

Using adhesive fixings is more straightforward. There is no need to drill any holes, and there will be no visible fixings. Simply apply the silicone based glue to the rear of the splashback and support it against the wall until the adhesive dries. Given that glue produces a seamless, attractive finish, it’s the approach preferred by many homeowners.

Can a Glass Splashback be Fitted Over Tiles?

What if you’d like to combine the look of a tiled splashback with that of a glass one? Or what if you already have a tiled splashback in place, but you’d like to install a glass one over the top?

There are a few things to consider before attaching a glass splashback to a tiled one. Firstly, note that doing so will create a splashback that’s effectively twice the thickness, which will slightly limit the space available and may mean that your splashback protrudes in places.

This will be especially noticeable around your sockets, which might need to be re-fitted. Secondly, you’ll need to ensure that the tiled splashback is adequately fixed to the wall, as the existing glue will effectively bear the weight of two splashbacks.

We would always recommend the complete removal of any previous splashback (tiled or otherwise) before affixing a new one. This will ensure the walls can be fully prepared before fixing and you don’t run any risk of miscalculating sizes.

How do You Clean Glass Splashbacks?

One of the crowning virtues of the glass splashback is that cleaning them is pretty much effortless. It is, after all, a smooth sheet of glass! With that said, a glass splashback will be expected to be subjected to a punishment of a different sort to, say, a window. It might become spattered with grease, oil and limescale so will need slightly different cleaning methods.

Glass splashbacks do not respond well to abrasive cleaners. Don’t use wire wool or brushes with plastic bristles. Instead use a small amount of gentle glass-cleaner and wipe it with a damp cloth. Allow it to dry gradually, out of direct sunlight. This will reduce the appearance of visible streaks.

If you don’t have any window cleaner to hand, then try a combination of water and distilled vinegar. This will break apart grease molecules, allowing your cloth to lift them away. Use a soft, dry cloth to remove any excess and reduce smears.

As with most domestic chores, it’s best to clean your splashback little and often. Don’t allow grease and dirt to accumulate as this will obviously make it more difficult to get good results each time.

In Conclusion

A glass splashback makes a fantastic addition to the kitchen. Coming in a range of different colours, they’re adaptable, easy to maintain, and effective. What better way could there be to protect your kitchen walls from all of those bubbling stews, boiling pastas and sizzling stir-fries?

What is Safety Glass and What are Its Uses?

Glass is a fantastic invention. It allows us to see into the outside world without having the deal with the weather, while at the same time allowing light to disperse through the interior of a building. Modern architecture wouldn’t be the same without it!

But for all of its considerable advantages, glass does have some downsides – the most obvious of which is its fragility. Without proper treatment, the delicate material has a habit of shattering into razor-sharp fragments with the slightest force.

Fortunately, the technology has come a long way over time and among the most notable improvements has been the development of reinforced, or safety glass as it’s commonly known. This is a special sort of toughened glass that’s been designed to limit the danger without compromising aesthetics. Let’s take a look at it!

What are the Different Types of Safety Glass?

Safety glass comes in several different sorts, of which two stand out as noteworthy: Laminated glass and tempered glass.

Laminated Glass

This sort of glass consists of two panels, between which sits a layer of plastic. In the event of an impact, this layer of plastic holds the fragments in place. This makes it difficult for an intruder to gain access. Also limiting the risk of accidental injury. As such, it’s ideal for settings where security is paramount.

Toughened Glass

Toughened glass is formed under special conditions. It’s heated to around 650°C before being chilled under controlled conditions. This results in a difference in tension between the outside and interior of the panel: the outer layers are squashed while the interior is stretched. This results in a glass that’s much stronger than usual.

Toughened, or ‘tempered’ glass panels are thus widespread in commercial settings. When they shatter, the tension between the interior and exterior causes the panel to crumble into tiny blunt chunks rather than large jagged shards, significantly reducing the chances of injury.

Another variety of safety glass is ‘Georgian wired’. This is constructed in much the same way as laminated glass, except that the interior panel holding everything in place is a wire mesh rather than a transparent plastic sheet. Georgian wired glass is weaker than other varieties, because the wires impinge upon the structure of the surrounding glass, weakening the panel. As such, it’s rarely used today, and serves as a historical curiosity.

Where Should Safety Glass Be Used?

There are several places where safety glass is mandatory. These include safety-critical locations like car windscreens. After all, collisions are unpleasant enough without adding flying shards of glass to the mix. But you’ll also find safety glass panels in museums, shops, glass tables, telephone boxes, bus shelters and fishtanks.

In buildings, safety glass is mandatory in certain places, these are called ‘critical areas’. Critical areas include:

  • Glazed door less than 1500mm from floor level.
  • Any glazed area in a window less than 800mm from floor level.

Windows within 300mm of the door are treated as sidelights, and thus subject to the higher 1500mm limit.

Is it Possible to Cut Safety Glass?

Once toughened glass is tempered, its size and shape cannot be changed. Cut into it and you’ll cause it to shatter into thousands of tiny opaque chunks. While it may be possible to remove a few millimetres from the edge of a piece, this could cause the tempered glass to weaken and ultimately break later down the line. The best solution is to get the glass cut-to-size from the very beginning. Fail to do this, and the chances are that your project will be needlessly delayed.

Laminated glass, on the other hand, can be cut. But it’s a job that requires precision and skill. You’ll need to score the glass on either side before gently moving the panels until they snap along the line. If this sounds a little risky, then it’s probably a better idea to bring a professional in to do the job.

Can you Drill Safety Glass?

Toughened glass is as impossible to drill as it is to cut: it will shatter as soon as the pressure within the glass reaches tipping point. In the case of untampered, laminated glass, two holes must be made on either side of the pane to stop chip marks emanating from the ‘exit wound’ as the drill passes through.

Will Safety Glass Shatter?

One of the major advantages of safety glass is that it will shatter evenly into small pieces, each of which has fewer sharp edges than those that result from a standard window breaking. Businesses prefer it for reasons of liability – if a display case is made from safety glass, it’s far less likely to injure a customer who trips and falls into it.

It’s worth noting that not all shatter-marks are the same. This is especially so in the case of laminated glass. Edge damage which occurs during manufacture, or during a poor installation, will spread to form a visible crack over the course of months or years. For this reason, it’s worth paying the little bit extra required to get the window professionally installed.

Can Safety Glass be Recycled?

When safety glass does break, it tends to be slightly more difficult to recycle than standard windows, which in turn are more difficult to recycle than, say, glass bottles. This is because the glass has a different melting point, and thus is more difficult to separate into usable raw materials.

Don’t chuck it in with the rest of your recycling. Instead, look for a specialist facility, and ask whether they can take the glass off your hands.

Conclusion

So, what have we learned? Safety glass comes in several different sorts to suit a range of purposes. If you’re shopping for a ground-floor door or window, then the chances are that you’ll need toughened (or ‘tempered’ glass). This will shatter into tiny blunt pieces rather than large sharp ones. Proper manufacturing and installation methods will reduce the likelihood of cracks developing after the glass is in place.